Keycloak is a self-hosted identity provider which supports the OpenID Connect (OIDC) protocol. As such, we may use it for single sign-on authentication in Memos. This guide assumes you already have a Keycloak instance set up and running.
Step 1: Create a realm for Memos
After logging into the Keycloak admin panel, navigate to the sidebar, click the realm dropdown at the top, then select or create the realm for Memos users log in through.
Step 2: Create a client for Memos
Once you have selected your desired realm, we must create a client for the Memos application to use.
- In the sidebar under "Manage," go to "Clients."
- Select the "Create client" button.
- Ensure "OpenID Connect" is selected for "Client type."
- Enter anything for Client ID, such as "memos."
- Click the "Next" button.
- The following values should be set as such:
- "Client authentication" toggled "On"
- "Standard flow" checked
- "Direct access grants" unchecked
- Click the "Save" button.
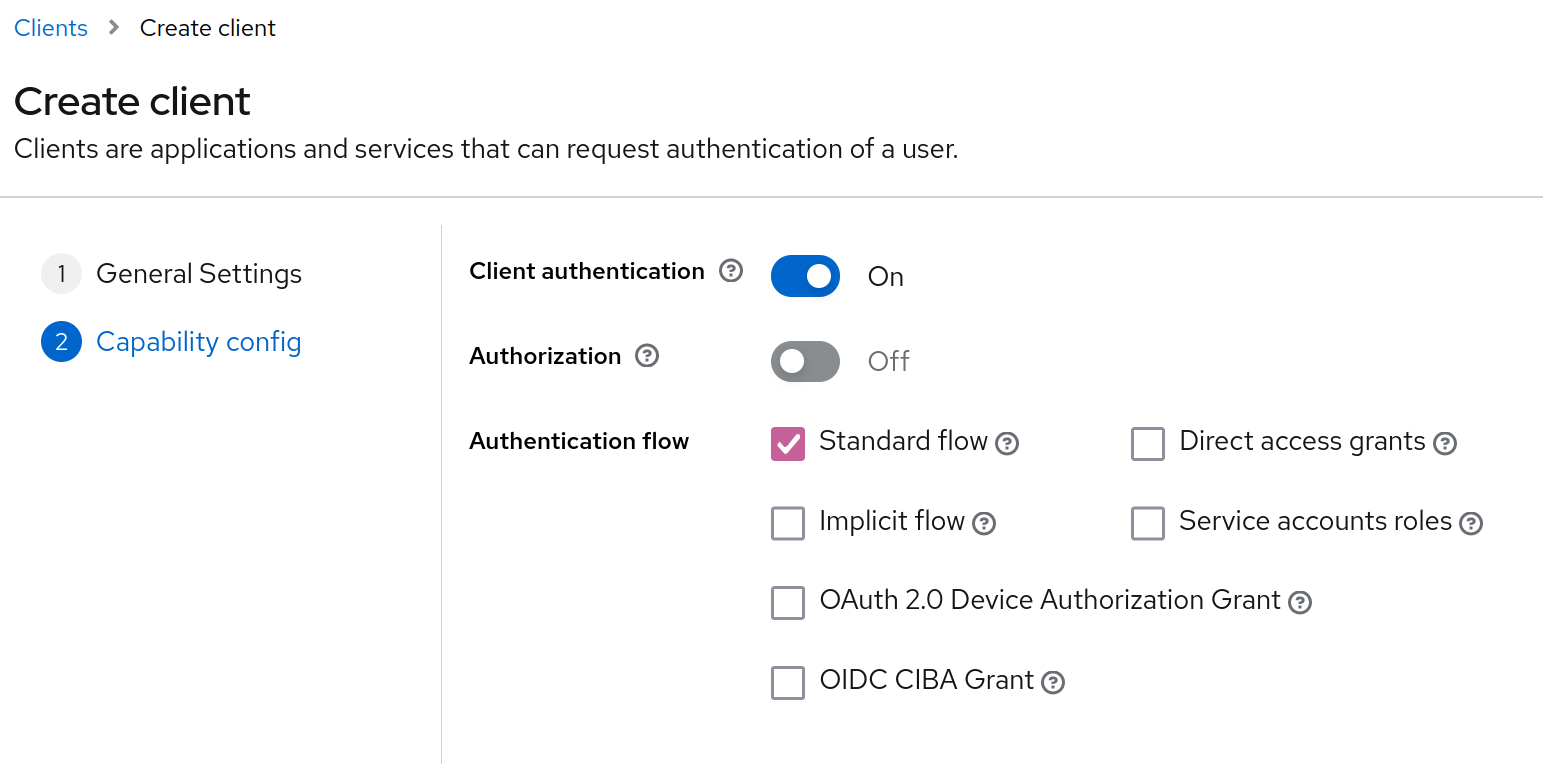 👆 A correctly-configured Keycloak client for Memos
Step 3: Configure the Keycloak client details
Now that we have created a client for Memos, we must now add the proper configurations. In the "Client details" of your newly created client, perform the following:
- Set "Root URL" to
https://<YOUR-MEMOS-DOMAIN>/. - Set "Valid redirect URIs" to
https://<YOUR-MEMOS-DOMAIN>/auth/callback. - Set "Web origins" to
https://<YOUR-MEMOS-DOMAIN>/.
Step 4: Obtaining the necessary endpoints for Memos
With the Keycloak client ready, all we need now is to copy all the credentials and authentication endpoints.
- Still under "Client details," select "Credentials."
- Copy down the "Client secret."
- Open the sidebar and select "Realm settings."
- Beside "Endpoints," click on the "OpenID Endpoint Configuration" link.
- Copy down the URLs under
authorization_endpoint,token_endpoint, anduserinfo_endpoint.
Step 5: Create a user in Keycloak
If you do not already have a user in Keycloak, we will create it now.
- Go to the sidebar, then select "Users."
- Click the "Add user" button.
- Enter the following:
- Set "Username" to anything you want. If you want to use SSO for your existing Memos account, set it to your Memos username.
- (Optional) Set "Email" to your Memos account email.
- (Optional) Set "First name" to your Memos display name.
- Click the "Create" button.
- Within the newly-created user, select "Credentials."
- Click "Set password," then add the desired password for this user.
- (Optional) Repeat steps 2 to 6 to create addtional users.
Step 6: Configuring Memos
Finally, we can open Memos and add Keycloak as an authentication option.
Log into your Memos account and select the "Settings" button.
Click on "SSO."
Click the "Create" button.
Under OAuth 2.0, select "Custom."
Fill out the following details:
- Set "Name" as anything you wish, such as "Keycloak." This will appear on a button on the Memos login page.
- Set "Client ID" as the one created in Step 2.
- Paste your client secret.
- Paste your authorization endpoint.
- Paste your token endpoint.
- Paste your user info endpoint.
- Set "Scopes" as
openid profile email. - Set "Identifer" as
preferred_username. - (Optional) Set "Display name" as
given_name. - (Optional) Set "Display name" as
email.
Note: If you set these optional values, the user in Keycloak must have an email and/or first name set, or else the server will return a 500 error.
Congratulations! You may now log into Memos using Keycloak! 🥳
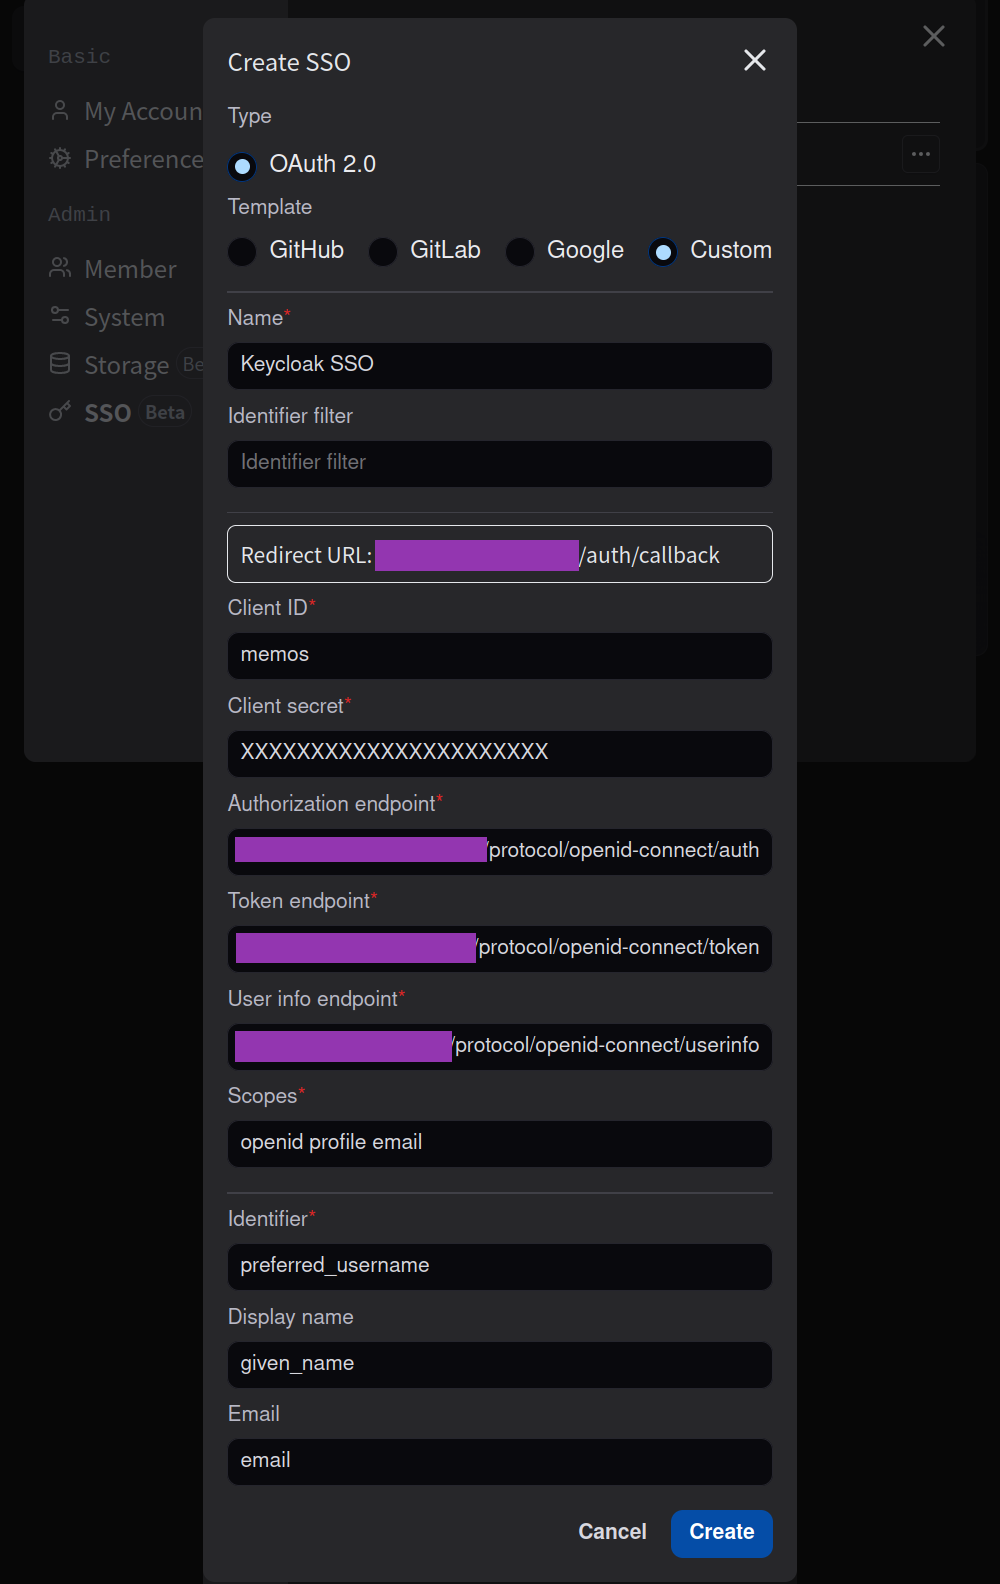 👆 Keycloak OAUTH2 entry in Memos